Friday, November 27, 2009

More Wheel pics

The rear axle is in. Used a pump jack to align the springs and get the U-bolts aligned up.  Put the wheels on and put the car on the ground.  Checked and measured fender to ground to make sure the car sits level. Replacing the rear torque boxes required a lot of measuring to make sure the springs align properly and the car is level. All good.


I installed stainless steel brake lines and the distribution block is for cars with dual exhaust.  With the single exhaust set up, the rubber hose for the brake line would run too close to the exhaust pipes if you were to add dual exhaust later.   Thus, the rubber would get too hot and possibly burst.

Inside the rear wheel well.

Bought 15 inch steel styled rims.  I added disc brakes in the front and since the 14 inch rims didn't have enough clearance I had to go larger.  Better looking than the 14 inch rims with hub caps.


Wheels on the Stang go round and round...

Here I am moving the axle toward the rear to set in place.  I rebuilt the rear axle a while back and from a Mustang Monthly article and I was able to reproduce most of the factory assembly markings.  While the axle sat on jack-stands I routinely turned the hub to keep the gear oil  moving around so the seals don't harden up and from blowing a seal later down the road.


I got the exact replacement U-bolts and nuts for the install.


Axle installed


Detail of the rear drum brakes


Sunday, November 22, 2009

Junk in the trunk!

I removed the undercoating from the trunk. I used a putty knife, screw driver and a hammer and wire wheel on a drill to clean off the undercoating.  They used it to cover up the rust.  A lot and very often.  The whole under-carriage was covered in undercoating to hide the poor work done and the rust. 


Got down to the rust and repaired the sections.  The metal was paper thin and had holes.  I had to replace parts of the inner wheel-well due to rust and repaired small sections as needed.


Wire wheel brush on a drill cleans the whole area very well. 


I spent a very long time working in this area.  It will be covered with a mat, but I try to make sure everything was cleaned up like new metal.   You can't see it but I can!


Primer paint


This area above saw a lot of rust.  I rebuilt parts of this area using scrap metal and forming to fit.  Welding and cleaning it up.  Yes I know it's in the trunk an no one would see it.  I did, so I fixed it.


I will shoot another coat of paint when I paint the whole car.


The belly of the beast!

A lot of fun cleaning and fixing the under carriage. Having a rotisserie would have been wonderful! But laying on my back, welding, grinding and cleaning is so much more fun!


Saturday, November 21, 2009

More fun and surprises!

The front apron had seen better days and needed to be replaced. Cleaned out the engine bay, and repainted the whole area and replace the drum brakes with disc brakes.

Here is the driver side apron.  Had a big crack in it.  I asked the guy I bough it from, "what happened?"  He said, "I don't know".  My best guess from my examination is than someone hit a tree on the drivers side.  Then the tow truck hooked a hook and chain to the rear floor support in the trunk. Thus causing the rip in the support brace.  My calculations Dr. Watson.


Fitting the panel.  All panels are no the same from where you buy them.  Most don't fit right. Make sure you are happy with the fit and it looks right or replace it or fix the problem.


Cleaned it all up with a lot of work.  4 drills, and dozens of wire wheels.

Paint. 


Putting in the disc brakes set up.


Sunday, November 15, 2009

Eat my Rust! :-)


Air hammers, saws-alls, angle grinders with cut-off wheels to remove all the rust.

I had to remove the floors and torque boxes to replace the inner rocker panel.


You can see the rusted inner rocker panel in this photo.


The inner rocker panel is removed and you can see the outer rocker panel. It is rust free.


Welding on a new floor support on the passenger side.


Saturday, November 14, 2009

Drivers side floor replacement


I cut out the old rusted parts and replaced the inner rocker panels, floors, torque boxes, back seat floors, one floor support, one truck support, two front aprons and who knows what else :-)


Cut the floors out one side at a time.


New rear torque box


Removed the old torque box and installed a new inner rocker panel

New torque box


New front torque box from inside the car


New under seat reinforcement pan


New rear seat floor


Drivers side is almost finished. I reused the seat riser because it was rust free.

So I bought the car...

I bought the 1966 Mustang and towed it back to my house. I began to go through the car and figured I could just do a few things and get her road ready. Well to my surprise, it became more work than I imagined. Someone had welded partial floor pans on top of the rusted ones. The inner rocker panels on both sides were rusted out. The engine had been running low on oil for who knows how long and someone jammed electrical tape into the PCV valve because it was clacking (that means the PCV valve needs replacing). So I just started taking it all apart in my garage and worked on everything. Labeling is very important. Bagging and boxing everything you can.


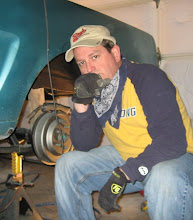
I look happy :-)


The floors. Amateur body shop. This was ugly work. New floor panels welded on top of the rusted ones. What were they thinking?  "Let's slap her together, Bondo the crap out of it, spray it with undercoating and sell it!"


Here you can see when I cut the floor pan out to find another floor pan.  I was being careful where I cut because I wanted to save the bolt hole for the seat belts.


The joy of removing old rusted floors.  You can see the rusted inner rocker.  The outer rocker was completely zero rust.  Weird.  Here I am removing part of the floor, under that is the seat reinforcement pan.

You can see one of the floor pans hanging on the wall.