Last blog I was still working on the hood. Here is the pics of the final work and priming stage.
Tip looked worse before. Sharpie works great for pointing out the area that need attention.
Add a little metal to the low areas.
Cleaned up and ready for some primer.
Prep and paint.
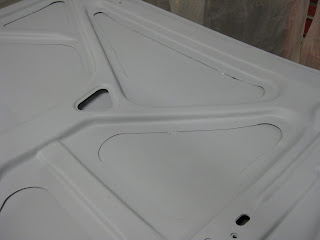
Remember the inside of the hood when I cut away the skeleton? Protection being applied.
A little more prep work needed. The green spray is from the frame coating.
I use a heater under the hood to help the paint dry. Don't spray with the heater on though.
Looking better.
More prep on the top.
I brought the hood down to the basement without taking a pic. Here is the outside edge of the hood.
The inside edge.
Finished. Because of the pin holes from the rust I replaced one of the oblong holes towards the tip of the hood.
When I cleaned off the hood with the wire wheel, it ate away at the set up putty between the skeleton and the skin. I reapplied the putty with some Permatex form-a-gasket sealer and lifting up the panel to apply the putty. Worked well.
On to the fenders! Another challenge! Ugg :-(


