Dropping the Top! Literally!
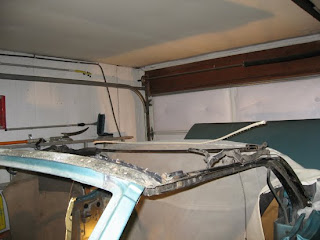
I will remove the cloth top, the frame, the power top hydraulics, paint the frame. Reassemble and then remove the whole frame as one. Store it away in the basement and continue to prep the car for painting. I had already removed the back part of the top (back glass/clear vinyl) when I worked in the top well. In my last blog I talked about how I should have removed the top before working in the top well. These are the stages I took to remove the top and frame.
First I removed the weather stripping and then started to work on bow # 1. There is 4 bows total. The front, two in the middle and one on the back. Bows 1 and 4 have tack strips. Bow 1 is made up of alloy and the rest are steel.
Bows 2 and 3 look just alike except they fit differently and they are marked on the inside JIC. They also had a felt padding inside the ends of the top of the bows. I guess to keep lines from showing up in the curve of the sides in the top. This area showed a lot of rust issues because the felt was so thick, it held moisture for a long time. You will see this in part II.
These next few pics are the break down in stages. It helped a lot to still have the power top working.
Bow #4 tack trim being removed.
The locking truss and handle. The driver side handle was broken and I replaced it years ago with this aftermarket handle. Notice the shinny bolt and no ford part number. And the spring is missing. I will make this part look much better when finished. It is a lot easier to work in the area without the top on.

Just about finished with removing the cloth. It has a lot of staples to remove. Pulling and prying and it will come off. Like I mentioned before, keep the old top for a template for the new top.
Next is breaking down the frame. Media blasting it, paint and reassemble.


No comments:
Post a Comment