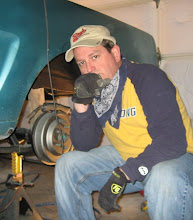
Of course I am going to repaint the car. I have painted a few cars before and I also have better equipment. I have no choice at this point. I thought about just touching up the paint job and matching the paint color but after many attempts I found they never used the original color to paint the car. They got it close, and I got close to matching that color, but it is still not the original color. So I am just going to finish it up on the correct side as close to stock as possible. Fixing the area of the trunk has been a huge task and still more to come.
Enjoy! More to come soon!

Not much can be done to fix it other than cut the welds and align the panel. I only cut the rear welds so I could match it up. When you need to replace panels, dry fit everything around that area first before welding then tack weld and look again and again...

Additional pics uploaded 033010. Here is the butchery of hacking away at a poorly hung rear quarter panel. I had to cut away at the welds from the previous work. I cut a V into the lip area and inside the trunk I cut away at part of the panel it attaches to.
A lot of ugly work being done. Cutting and metal bumping.

Still hacking and drilling and bumping!

Close to being finished!
This is how I goo on the sealer.
Cheap soft bristle toothbrush (4 @ $2) gives me a better grip than the acid brush.
Seam sealer Fast n' Firm ($20). Save all you can from this tube. I seal it back up when finished which is why I don't use it in a caulking gun. If you can get it close to a lamp or heater, it spreads much better when warm.

A little dab will do ya!

Give it that nice brush stroke texture.

And the passenger side is sealed!

Fixed it after many hours of working the metal.
I just loose fit the end caps for a sight check. There is a rubber seal that need to go under the caps during assembly.

Looks much better! Tweak the trunk lid a bit and it will be fine.
Drivers side
Now I need to fix that warble in the middle of the rear panel next to the gas cap.
More to come! I am using my good camera now and not the iPhone to take pics.


Nice Job re-aligning those rear quarters. I could learn some stuff from you. A little more detail regarding "Fixed it after many hours of working the metal" would be good. :-)
ReplyDeleteKeep up the good work and thanks for blogging it!
Thanks Alex and thanks for following!
ReplyDeleteThe many hours of working the metal details was cutting, banging, cursing, scratching my head going WTF? I also studied metal bumping which was helpful in some areas. Ended up drilling, and cutting with a dremel tool on the inside joining panel of the fender to get the fender down far enough to fit right.
My goal was to make it fit right with the least amount of body filler as possible. That is where the metal bumping came into play.
Very nice work James! The metal working pics really show how much time, effort, and quality you're putting into your car not to mention your sheet metal skilllllzzz!
ReplyDeleteHey James I have been looking for weeks for a posting just like yours. I fell victim to buying a convertible that was really just a poorly modified coupe. I have already bought all the parts to convert it to a true convertible )in all but paper) but am unsure exactly how to do it? Would you be willing to write a short explanation about the required bracing and modifications needed to accomplish this along with some pics of the rear seat area? It would be really helpful. Love reading your post and your restoration is beautiful. Thanks.
ReplyDelete