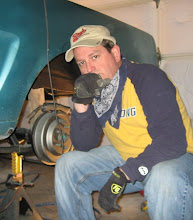
Putting the car back together is more fun when it all starts to go according to the plan. Here I am cleaning up and putting the driver side rear quarter glass back in. Wrap it up to keep it from getting over-spray from painting the car.
I welded this area of the quarter panel but first I removed the glass. Glass and hot weld slag doesn't mix I know from experience. CarLite original glass is hard to find in good shape and replacement new glass is not cheap. $250 each. Ouch!
When I needed to put the top down for the quarter panel window project, I didn't have a battery for the car. I used a jumper-box before but it died on me and wouldn't hold a charge. So I grabbed a gel cell from the battery backup UPS I use for power outages. It's 12 volts. Hooked it up and it works fine.
Wow! The car looks pretty cool from this angle. You can also see the garage door insulation I added during the winter. It really helps to keep the garage warm or cool depending on the climate. Working next to the garage door, you sure can feel the temperature outside so this was a bonus for my Man-Cave! :-)

I pulled the window out and removed the glass. Cleaned it up with a razor and glass cleaner. Polished the plating with fine steel wool and buffing wax. Put the glass back into the frame and cleaned it up again. Soft grips on the bench vise and you can also see the Scott Drake Window crank still in the plastic behind the window. LOL. That's been there a while.

Laid out the parts, and cleaned up each one.
Diagram, not much help but I didn't need that round rubber thing. Where did it come from? It was in the take apart. Who knows.

Glass and frame are back inside the quarter panel. It is a lot tougher than it looks. After many tries, I figured out you have to put the glass into the window area first and insert the glide-guide into the window or else the end-stops will not allow it to fit into the channel section. If you have ever worked in this window channel, it is a pain unless you know the order to install each part and I cannot find the information anywhere. Hope this helps anyone else out there that is trying this.
Post more pics soon! I'm working everyday on this pony!


Nice work James. Honestly, this is one of the tasks that I'm not looking forward to. I remember pulling the windows out was a hassel and I can imagine how putting them back in will be.
ReplyDeleteThanks Alex! This is a very frustrating area to work in. I'd rather rip the quarter panels off to fix these windows! But, once I figured out how to work them into the channels it was easier. And use that striker area opening to get the frame into the channel.
ReplyDeleteHi James, I think that round rubber bumper is bolted to the track and keeps the window from bottoming out when it is lowered all the way. One side on my 66 coupe had it and the other did not. Definitely a bit odd.
ReplyDeleteThat's what I thought. But it already has a stop on an L bracket. It is odd. I'm guessing the round rubber stop was on the driver side? Makes sense because that is the side the wiring harness goes on. Humm... I will figure it out where and post it unless someone else can tell me. Thanks!
ReplyDeleteThe wiring to the trunk doesn't go under the window. There is a channel that goes around the window to the trunk. Humm...
ReplyDeleteRemote open-trunk latch cable protector? That runs on the drivers side and would run into the trunk over the rear wheel and into the trunk. The round rubber bumper has no wear at all. Remote opener for the trunk latch was an option. humm..
ReplyDelete