Been a while since I made a post on my blog. Promise you I have not been slacking, but held up with other issues. I will do my best to get you up to date.
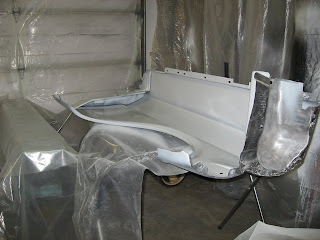
I went to tackle the fenders, and thought they would be simple strip, and prime. LOL! As we all know it never works like that. I started with the Driver side since it was replaced when the car was in a wreak. Looks pretty obvious from all the body work it was hit from behind, went off the road and hit a tree on the drivers side. They fixed it up and found a victim to buy it. My guess is I am victim number 2 since the people I bought it from had it for a while due to the amount of crud under the fenders etc..
I start to remove the paint with a wire wheel on a drill.
I put plastic on the garage door, and hung sheets to help with the dust and vacuum up when done.
I figured it was a new fender and a paper tag on the inside showed it came from a Ford dealer in Delaware. Which makes sense because I bought the car in Maryland which is close.
As I get to the front of the fender, I find body filler. They had filler all over the hood in this area.
Removal of the filler and I find damage to a new fender?
More filler.
I removed the headlight bucket area so I could repair the damage to the front
 |
| Welded back in place. |
The front edge was a mess.
Add metal
Shape.
Primer.
Test fit the extension.
Needs more work.
Shaving the metal
Looking much better.
Prime the front.
I found the fender anchor was missing so I welded one in.
I am finishing up the other fender now so look forward to an update.


Looks good! And hey, at least your headlight bucket housings weren't all rusted out like mine. :-)
ReplyDeleteGreat stuff there James! Glad to see you're still at it hard!
ReplyDeleteNice attention to detail and description too.
ReplyDeleteThanks for the nice comments!
ReplyDeleteJames, you make it look so easy, which it certainly isn't.
ReplyDeleteHi i would like to say thanks for your above post it's a very useful post for those guys who wanna know about the same!
ReplyDeleteHeadlight Restoration
You're a pro! Nice work.
ReplyDeleteThanks for the feedback! It makes me feel good when I get positive comments. This work takes forever and I pay way too much attention to the details.
ReplyDelete