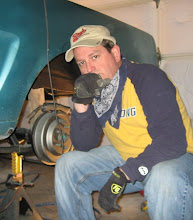
Then I cleaned up some poor weld joints in the rear quarters.
I had to do the same to both sides. Someone before me enjoyed slathering on the bondo!
So I took the trunk lid to the basement and brought out hoodie. Never knew why they painted the underside black.
What's this? A crack? humm...
Why would someone weld rods onto the tips of a hood? Because it was in a fender bender long time ago and some body shop decided to hurry up and slather bondo all over my hood. Well I could replace the hood, $400 or fix the original hood for next to nothing! Here is my hoodie story work.
Removing the paint!
I tried the spray on paint remover. Worked good but multiple layers needed some help.
There is the layer of bondo to hide the real problem.
Not only did they use a gallon of bondo on the hood, they used large body files to screw up the rest of the hood. Dents, dings, blaa. I thought about the $400 for a new hood again.
My reaction to the hood condition.
So I made a template of the passenger side of the hood.
This doesn't look right. Two rods welded onto the tip of the drivers side? This made no logic as I moved on. Maybe to hold all the bondo.
Mark up the skeleton side of the hood to cut. Yep, I'm going to peel back the hood skin and remove the skeleton so I can metal ding the hood back to some kind of normal shape.
Peeling back the skin.
Removed the section.
Still not sure why they had to weld rods onto the hood. The lip was still in place. Sure maybe on a door edge to make it fit, but the front of the hood?
It's called metal bumping not metal banging! LOL. Sponge was used for heat and shrink with water.
Ugly hood tip after I removed the rods from the front.
Why? They didn't have a ruler to know it's same size as the other side?
Broke out old Spotty O'Welder to attach the backing plate where the rubber hood stops matches up.
Trying to fit the section back in. It came out easy.
Clamp it down to hold it in place as I bend the lip back over.
Skeleton wants to fit, sort of...
Fitting the part back in looks easier than it does. I'm thinking I should have just bought a new hood.
Need to prep the metal for primer.
More to come....


James, If you pull this off, you're my new "savior of original metal" hero. I thought of taking my hood and/or deck lid apart but I just didn't have the guts (plus my bumping skills are non-existent). :-)
ReplyDeleteThanks Alex! You are always a positive reinforcement to all our projects! Should finish the hood soon. Quality check is coming up.
ReplyDeleteKeep up the good work, I enjoy seeing it.
ReplyDeleteWOW James! That is an impressive level of commitment on that hood. I absolutely HATE skinning anything with a skeleton structure like that, but you sure tackled that job with impressive results. Hope the rest goes well!
ReplyDeleteThanks Sven! If I had to skin the whole hood off that would have been a lot of work. Figured I'd try a damaged section and if I failed, I'd end up buying a new one. And I learn more from practice with my metal bumping and mig welding.
ReplyDeleteThank you James......
ReplyDeleteI commend you for the hard work and pride you take it restoring this car, so much in fact that you have inspired me to go and start my own first time restoration of a 68 Chevelle, in fact a clone of my high school ride is what I hope to recreate. I will be following your posts and please keep up that great job!